How to make an online course – Part 1a: Audio-visual equipment
The latest instalment in our “How to make an online course” series focuses on the audio-visual equipment you need. See the previous one here.
Equipment requirements
We mentioned in the last post in this series that the style of the video that you choose to employ will determine the equipment that you require.
Here is the list of the five principal styles of video that educators can choose to make.
- Classroom
- Talking head
- Content & voice-over
- Animation / action
- Hybrid
You may wish to familiarise yourself with these styles here before you read further as the rest of this post assumes you are familiar with these terms.
Style 4 pertaining to animation / action typically requires access to specialist software so we’re going to focus on the other four styles in this post. If you want to see an example of this type of course, why not register an account and enrol on the Phonics and Early Reading Course (Taster).
Let’s start with style 3 first. This style involves the visuals focusing on a generated image with the audio explaining what is happening on the screen. The audio can be provided by a computer text-to-speech (TTS) program but it is likely that you will prefer to narrate the video yourself in which case you will require a method of capturing the audio.
Laptops often have built-in microphones but using a dedicated microphone will help you to improve the quality of the sound and avoid certain types of noise that may detract from the audio you want to capture.
Here are a few at some different price points. Note that COVID19 has led to everyone’s inner podcaster coming out and so you may find some of these products can be out of stock (hopefully only temporarily).
- Sennheiser PC 5 Chat Wired Headphone – Black. This kind of headset often gets described as being entry-level and it’s possible that you may already have a similar headset that can be re-purposed. If not, a headset of this calibre may suffice if you are budget-constrained.
- Rode Smartlav+ Lavalier Microphone for Smartphone. This is quite useful as it is a small clip-on microphone that connects to a smartphone headset jack. This means that you can record on the go / away from the laptop if that works for you without needing to purchase any stands to hold the microphone in place.
- Blue Microphones Yeti USB Microphone. This is a very popular microphone so much so that you’ll be hard-pressed to find a recommendations list that chooses to exclude this model. At double the price of the microphone above, it can be difficult to decide if the extra investment is right for you. If that’s the case, it may be worth considering some of the other items in the Blue range which are at cheaper price points.
- Rode NT-USB Microphone. This is a premium microphone that is often used by professional podcasters and voice-over artists.
You may be interested in learning more about different mic types to help you make more informed choices if any of the recommendations do not appear right for you.
One of the most common complaints that people make when it comes to audio is typically around the background noise which a microphone itself cannot solve. Much of the background noise that most people experience can be eliminated via best practice during the create / record phase of the content and then via the edit / review phase.
***
Video styles 1, 2 and 5 typically require the course instructor to be recorded on camera (here we assume that the hybrid style refers to a combination of styles 2 and 3 where, for example, you get a talking head in one corner of a PowerPoint presentation).
There are generally two key aspects to consider when thinking about recording video. The first item that springs to mind for most will be the recording device. The second but arguably more important will be lighting and that deserves a post in its own right.
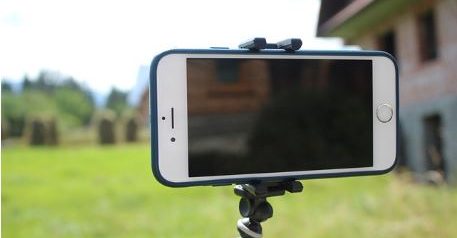
With regard to recording video, people can forget that smartphones can often deliver a very high level of quality even if the smartphone owned isn’t the latest top-end model. Similarly, a lot of digital camcorders / cameras have sufficient (HD) quality to record content. You may, however, require a tripod to set up the recording device at the right height and angle so be sure to think this through.
It can also be forgotten that laptop webcams are also often of HD quality and can suffice as recording devices if budgets are constrained. Again, there may need to be the consideration of getting a stand to get the webcam to the right height and angle to deliver well-framed shots.
The plethora of recording devices that are available on the market (partly due to the prevalence of smartphones) means that other than the first item on the list we are going to focus predominantly on the fixtures you may require to get good angles on your shot rather than the recording device itself.
- Logitech C920 HD Pro Webcam. This is a well-regarded model that is often bundled with other items as it is seen by many as a critical piece of kit. You may even see it bundled with the Blue microphones mentioned above to help create a production toolkit for content creators working from home offices.
- AmazonBasics Ventilated Adjustable Laptop Stand. This can help get the laptop to the right height for you to use the webcam.
- Joby JB01511-BWW GorillaPod 1K Stand. This can be used to get your mobile phone or digital camera to the correct height for shooting video. Be sure to check that you have the correct adapters to fix your devices to the tripod.
- AmazonBasics 60-Inch Lightweight Tripod with Bag. This can be used to get your recording device to the right height if you are choosing to stand.
We mentioned earlier that lighting can actually be more important than the device. This obviously does not mean one should solely focus on the lighting but those new to video production do not always give it enough time and thought. Don’t forget to sign up to our course to make sure you don’t miss the next post (on lighting).

Responses