
How to make an online course – Part 3: Create / Record
The latest instalment in our “How to make an online course” series moves on to the third stage focused on how to create / record content. The previous posts covered planning ( with associated posts on audio-visual equipment and lighting) and storyboarding.

What you do in this stage depends heavily on the style of video that you will be creating. The type of content that you intend to record (e.g. slides vs. a video of you talking to the camera) will dictate the preparation (i.e. content creation) that you need to before you start recording. There are also decisions to be made regarding the software that you will be using to create and/or record your content. Let’s take a look through some key ideas.
Content + Voiceover
In the last post, we discussed how if you were creating a Content + voiceover style of video you might be creating a mock up of some slides for your storyboard. Now, in the Create / Record phase, you would be creating these slides using software like Microsoft PowerPoint, Google Slides or Apple’s Keynote. Content can also be created in other forms such as Canva or digital whiteboards. As we mentioned before in earlier blogs, you may wish to be mindful of how this content looks. Consistency and a high quality level can be achieved by getting some feedback from as many people as possible. If you get this feedback when you have only created a small proportion of your overall output you can use this inform the full body of your work early on in the process and reduce disruption.
It is worth getting feedback on things such as those listed below. It’s worth noting that for some items on the list, feedback will only be valuable if received on the video content rather than just the slides alone.
- colour palette used for content
- font selection and size
- balance between text and images
- quantity of slides / content type
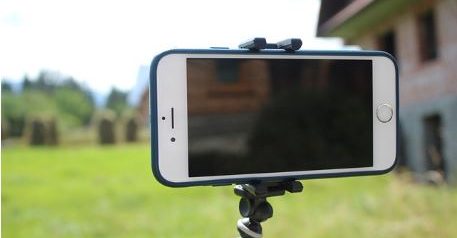
You may also write a script in software such as Microsoft Word. Scripts can be useful as they can ensure that you cover of everything you intend to say in as concise a way as is natural to you. The trade-off is of course the loss of spontaneity that everyday speech has and some people can fall prey to becoming monotone script-readers so watch out for this. To help you with the recording phase you may be interested in looking at teleprompter apps (e.g. Selvi) if you will be using your phone or a tablet to record. This way you can ensure that you look at the camera when reading rather than looking to the side or down on to a printed script.
While getting feedback on the script is useful early on avoid things such repetition and clunky wording, you’ll also need feedback on the final video. This is because feedback on the following can only be given then:
- speed of speech
- intonation
- volume
- excessive filler words (“um”, “erm”, “like”, “you know” etc.)
- any involuntary noises made by the speaker (stop sniggering at the back, we mean noises like those that dry lips may make like “tsk” before one starts speaking or any accidental whistling through teeth!)
If you want something to critique, take a look at the video here which we created as part of a proof-concept exercise. How would you improve it?
Lastly, when it comes to recording this content, you will need to use screen recording software. There are a number of examples that are worth considering such as Zoom, Open Broadcaster Software, ShareX, Quicktime, Camtasia, Adobe Captivate, Screenflow.
A key factor to consider here may be how you plan to edit the recording after you have made it. You may need to use additional software to do this and it is worth being aware of which file formats are supported by both the recording software and the editing software. One way to avoid thinking this through is of course to use integrated software (such as Camtasia) that combines the recording and editing functionality.
Classroom / Talking Head

If you are making a video which involves recording yourself or others on camera then hopefully you’ve seen our previous blogs on equipment that you may need. There are some additional tips to bear in mind when recording such content. These include things like:
- Environment: a clean, tidy environment tends to go without saying so it’s probably worth highlighting the need to avoid having any reflective or distracting content behind you when recording. Don’t forget about keeping your environment quiet too by turning off devices, household appliances and alarms.
- Personal appearance: advice in this area can be quite subjective but an area to think about includes whether you are presenting yourself in a way that will make it easy to build trust with the learners watching your videos?
- Voice: staying hydrated to keep your voice clear and doing some warm-up exercises for your voice to ensure that you speak with impact.
- Dead time: as you are likely to be editing the recorded content down, don’t be afraid to have a little “dead time” of 5-10 seconds at the beginning of the recording where you are simply looking at the camera. You may wish to give a quick smile before you start speaking. This can quite useful in the editing process as it can provide a buffer, for example, if you will be cutting between an introductory scene and the main content you are delivering, the buffer will avoid the transition seeming abrupt. You can cut the dead time to personal preference when editing but it’s good practice to give yourself this option.
- Beyond the dead time that you might record at the beginning of each video, there is a related but much more useful concept which is that of a b-roll. B-roll footage can be thought off as any footage that is not core to the video content. It can be stock footage taken from free video sites or additional footage that you record at the same time as your core footage. Examples of the latter might include out-takes from your core footage, shots of you / or whoever is supposed to be on camera from a different angle (I.e. not straight-on), shots of the your production set and so on. These can be spliced into your final edit and act as buffers that can aid transitions between scenes or even cover up anything that you might not want visible in the final edit.
As with the content + voiceover videos, once you have recorded the content, you are likely to be editing the recorded content. Due to the type of content you will have recorded it is possible that you may need more editing tools than if you were simply recording a voiceover for some slides. If you are not experienced with editing video content, there are an increasing number of online services that provide some basic features to help you get to a certain standard. If you find that these do not deliver the impact that you require, you may wish to develop your editing skills through a short course and use some of the advanced features on software such as Camtasia and Adobe’s various software applications such as Premiere Pro.
Animation / Action [Please note that the video below contains flashing images and may not be suitable for everyone]
These kinds of videos might have seemed out of reach for ordinary people with average laptops and phones 10 years ago but human creativity combined with technological advances (making hardware and software cheaper) have made it possible. Even creating short animation videos is possible with the likes of Toonly, Doodly and Powtoon among others.
The range of videos that one can create in this style is so wide that we could not possibly offer tips for this in a way that does the topic justice. One thing that’s worth mentioning, however, is that there is a line between being impactful and being gimmicky – please don’t stray over!
Best practice
Sometimes it can be difficult to get external feedback so we may need to look to other external guidance checklists to help us see how we measure up. Best practice guidance can often be written from quite specific perspectives that relate to the writer of the guidance. It can therefore be worthwhile to finding perspectives written from a diversity and inclusion perspective to help us consider a broader perspective. Perhaps the most critical viewpoint here is that which concerns accessibility design principles which seek to make content accessible for all users, including disabled people. Some of the best accessibility-focused guidance we have seen has come from the accessibility team in Home Office Digital. They have kindly created these posters and shared them under the Creative Commons 4.0 Licence.


Responses